Blog Element


Still using pen and paper for your cutting lists?
Upgrade to Meru Timber’s Online Cutting List Optimizer! Our revolutionary platform allows furniture makers, DIY enthusiasts, and interior designers to effortlessly create, edit, and manage cutting lists anytime, anywhere—no workshop visit needed! Whether you’re designing kitchen cabinets, wardrobes, or custom furniture, our 24/7 platform gives you complete control over part sizes, edge banding, and CNC machining, all with just a few clicks.
Enjoy instant quotes, real-time production updates, and a clear view of your layouts and off-cuts. It’s smart. It’s fast. And it’s made for you.
Ready to simplify your process and bring your ideas to life?
Let us dive right in!
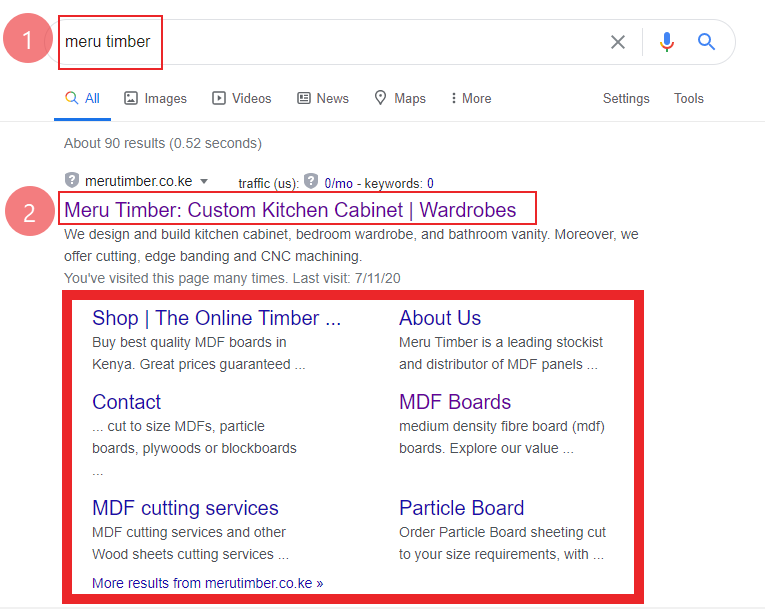
To access our platform:
💡 Pro Tip: Save time further—bookmark the Meru Timber website in your browser favourites for quick access whenever you need to create or manage a cutting list.
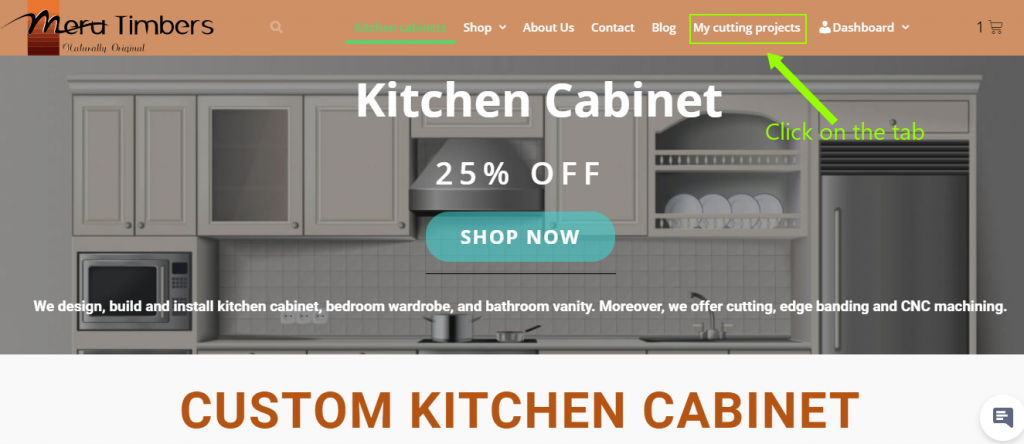
Now that you’re on our website:
You will then be directed to Meru Timber web as show below. Now, you need to click on ‘my cutting list projects.’
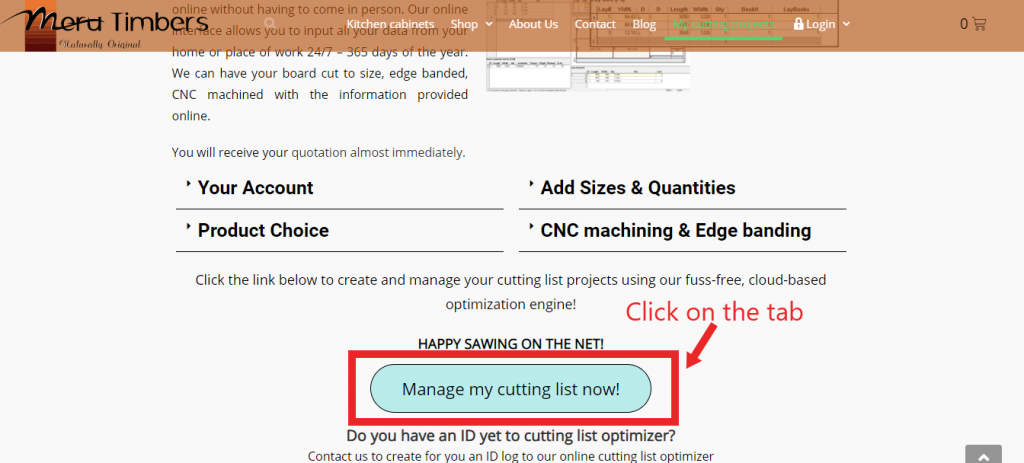
Alternatively, you can directly access our online cutting list management and ordering platform.
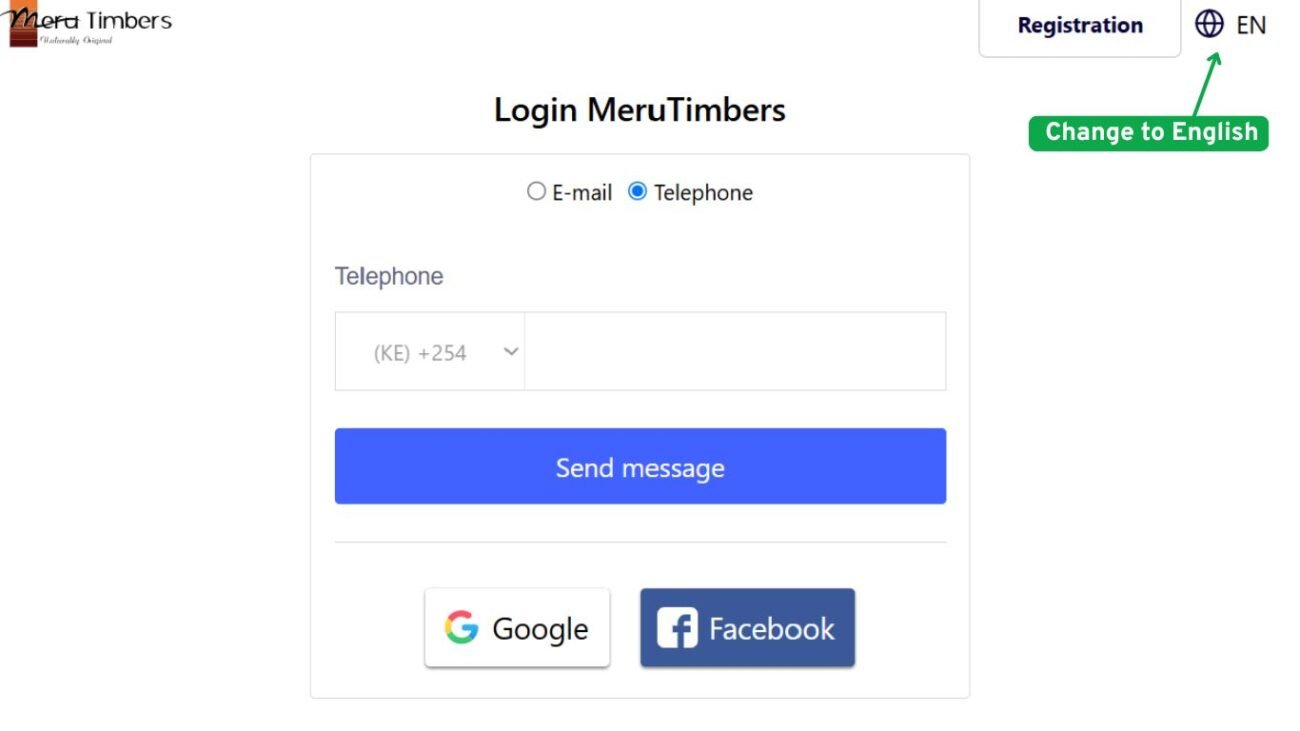
Scroll down to the bottom of the page and you will find a tab with the name ‘Manage my cutting list now!’ Click on one of the tab.
Enter your credentials to access the online cutting list platform securely.
Want to make the most of our cutting list optimiser without reading a manual? Watch our brief video for essential tips—perfect for busy professionals!
🔍 In just a few minutes, you’ll learn: - How to add materials quickly and other hidden features to save time. Get started now and work smarter, not harder!
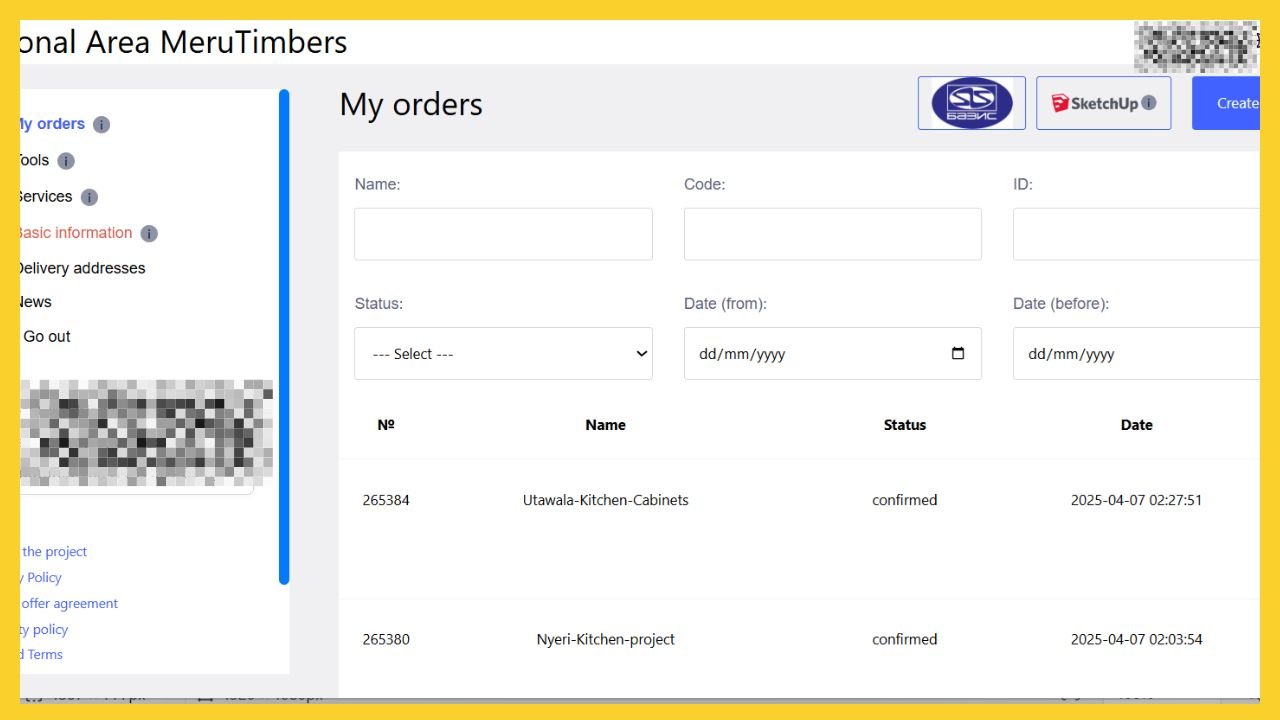
Welcome! 🎉 It’s time to explore your cutting list dashboard, the control center for all your projects.
Here is what you’ll find:
🗂️ Project Names & Dates – Easily track and organize your cutting lists.
✏️ Edit Mode – Jump back into any saved project and continue working. (Please note that once you confirm your cutting list as an order, you cannot edit it).
✅ Confirmed Orders – View projects that you have submitted for production.
📦 Completed Orders – Check the status of finished jobs that are ready for shipment..
✨ Ready to start a new project? Click “New Project” (located at the top right), name your project, and begin building your cutting list for wardrobes, cabinets, or any other project you’re working on. It’s fast, flexible, and designed to make your workflow effortless!
Now, it’s time to bring your project to life by adding the needed materials! The boards and the edgebanding tapes are used for this.
Start by selecting from our extensive database of boards and edge banding tapes sourced from trusted local and international suppliers. Simply search for the required materials and add them from a drop-down list.
Need to use your own materials?
Need to use your own materials? No problem! Click “Customer’s Goods” to manually add your custom board or edge tape. This option is perfect if your material isn’t listed in our database—just make sure it’s not available in stock before using this feature.
📦 Already have a saved design?
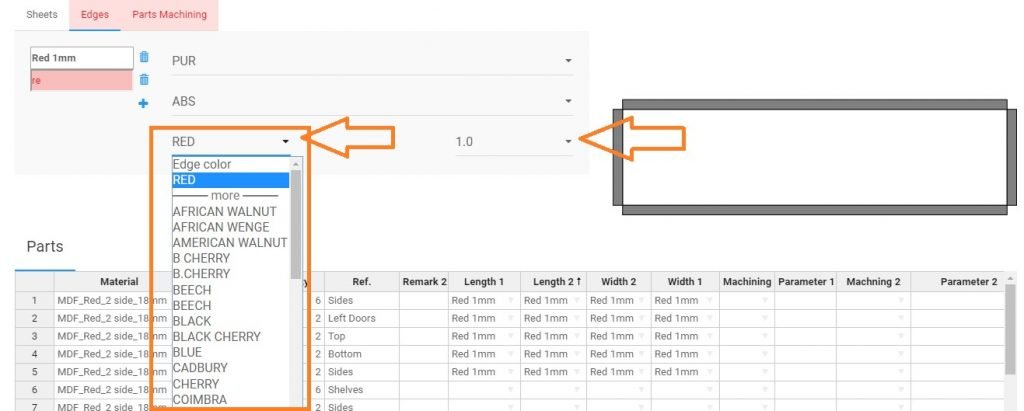
This step is where you will fill in the necessary parts for your project. The box “Material” is to be filled by the reference of the desired product.
Note: by clicking on the boxes that appear in red, you will be able to fill in their content.
In the interests of compatibility, we request you to avoid accents and special characters in these boxes.
by clicking on the boxes that appear in red, you will be able to fill in their content.
The arrows indicate the drop-down menus that you can use to refine your selection. The cross allows you to delete and reset the settings.
Tip (light bulb): using our internal references, the various drop-down menus are directly filled with the appropriate attributes. (The references must be entered in capital letters).
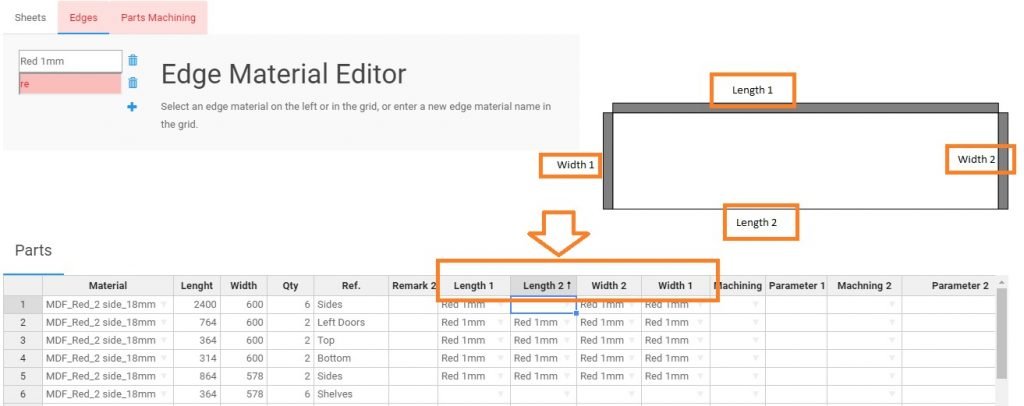
Then clicking on the edges tab, you will be able to define the different characteristics of your edge-banding and especially the colour and sizing of the material. It is therefore possible to enter the characteristics via the drop-down menus, without forgetting specify the color and size of the edge-banding in the custom configuration box.
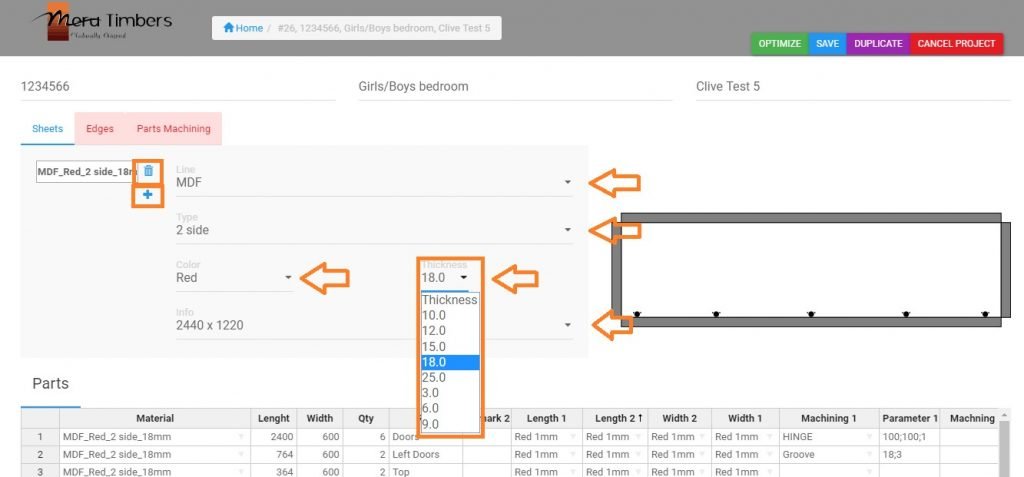
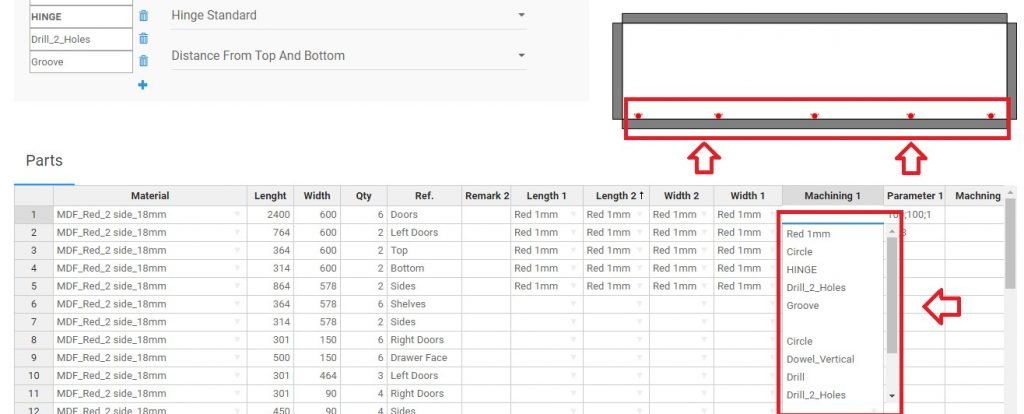
Once you have entered the type of panel board, the length, width, quantity of parts to be cut including edging, you can further determine the machining to be carried out on the part. You have up to four machining options for each part i.e Machining1, Machining 2, Machining 3 and Machining 4. Each machining has several CNC operations as demonstrated below:
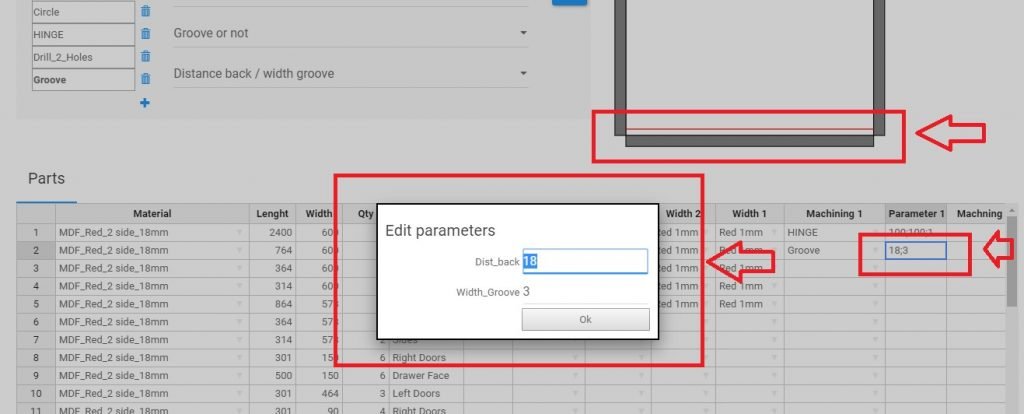
The dimensions for CNC operations in each machining can be determined parametrically by adjusting the sizes and location of the machining in Parameter 1, Paramater 2, Parameter 3 and Parameter 4. For example if you need a groove on any parts which is 18mm away from the edge and with thickness of 3mm. You select Groove from either of the machining 1,2,3 and 4. Then you click on the grid in the parameter column and pop-up dialogue box will appear. Key in the dimensions as that you would desire we cut for you. See the highlighted example below.
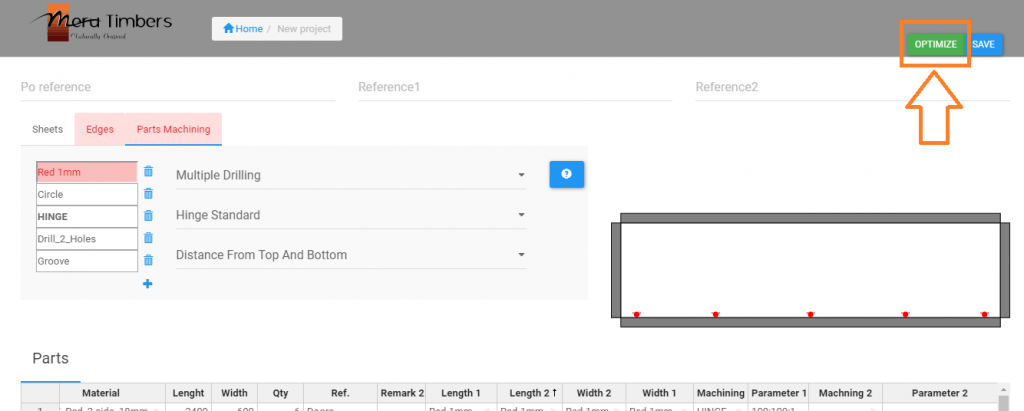
Once you have completed filling in your cutting list project and each red highlighted box, you should get a screen like the one below. You just have to press the button “Optimize “to launch your optimization. You then get the screen below:
Thanks to the optimizer, you can easily control:
You can then decide to validate your price request or modify your request via the tabs at the top right.
We hope this guide will help you become familiar with using our optimizer.
Please note that we remain at your disposal for any questions you may have.
+245-721-534508, by mail to info@merutimber.co.ke or you can contact use.
Having a problem using our optimizer?
Give us control of your computer remotely by downloading teamview on your computer and sending us your teamviewer ID and Password, so that we showed you how our online platform works.
Horsens / Denmark
The company reinterprets tradition by calling upon international designers to work with them and developing new technologies and materials to guarantee innovative and surprising results. Passion is the engine that drives the brand.
Nordic design inspires HAY's taste for clean lines, simple geometric shapes, and quality materials like wood, metal, and textiles. Anyway, you still use Lorem Ipsum and rightly so, as it will always have a place in the web workers toolbox.
Copyright © 2026 Meru Timber.
No account yet?
Create an AccountWhatsApp us
Get notified about new articles